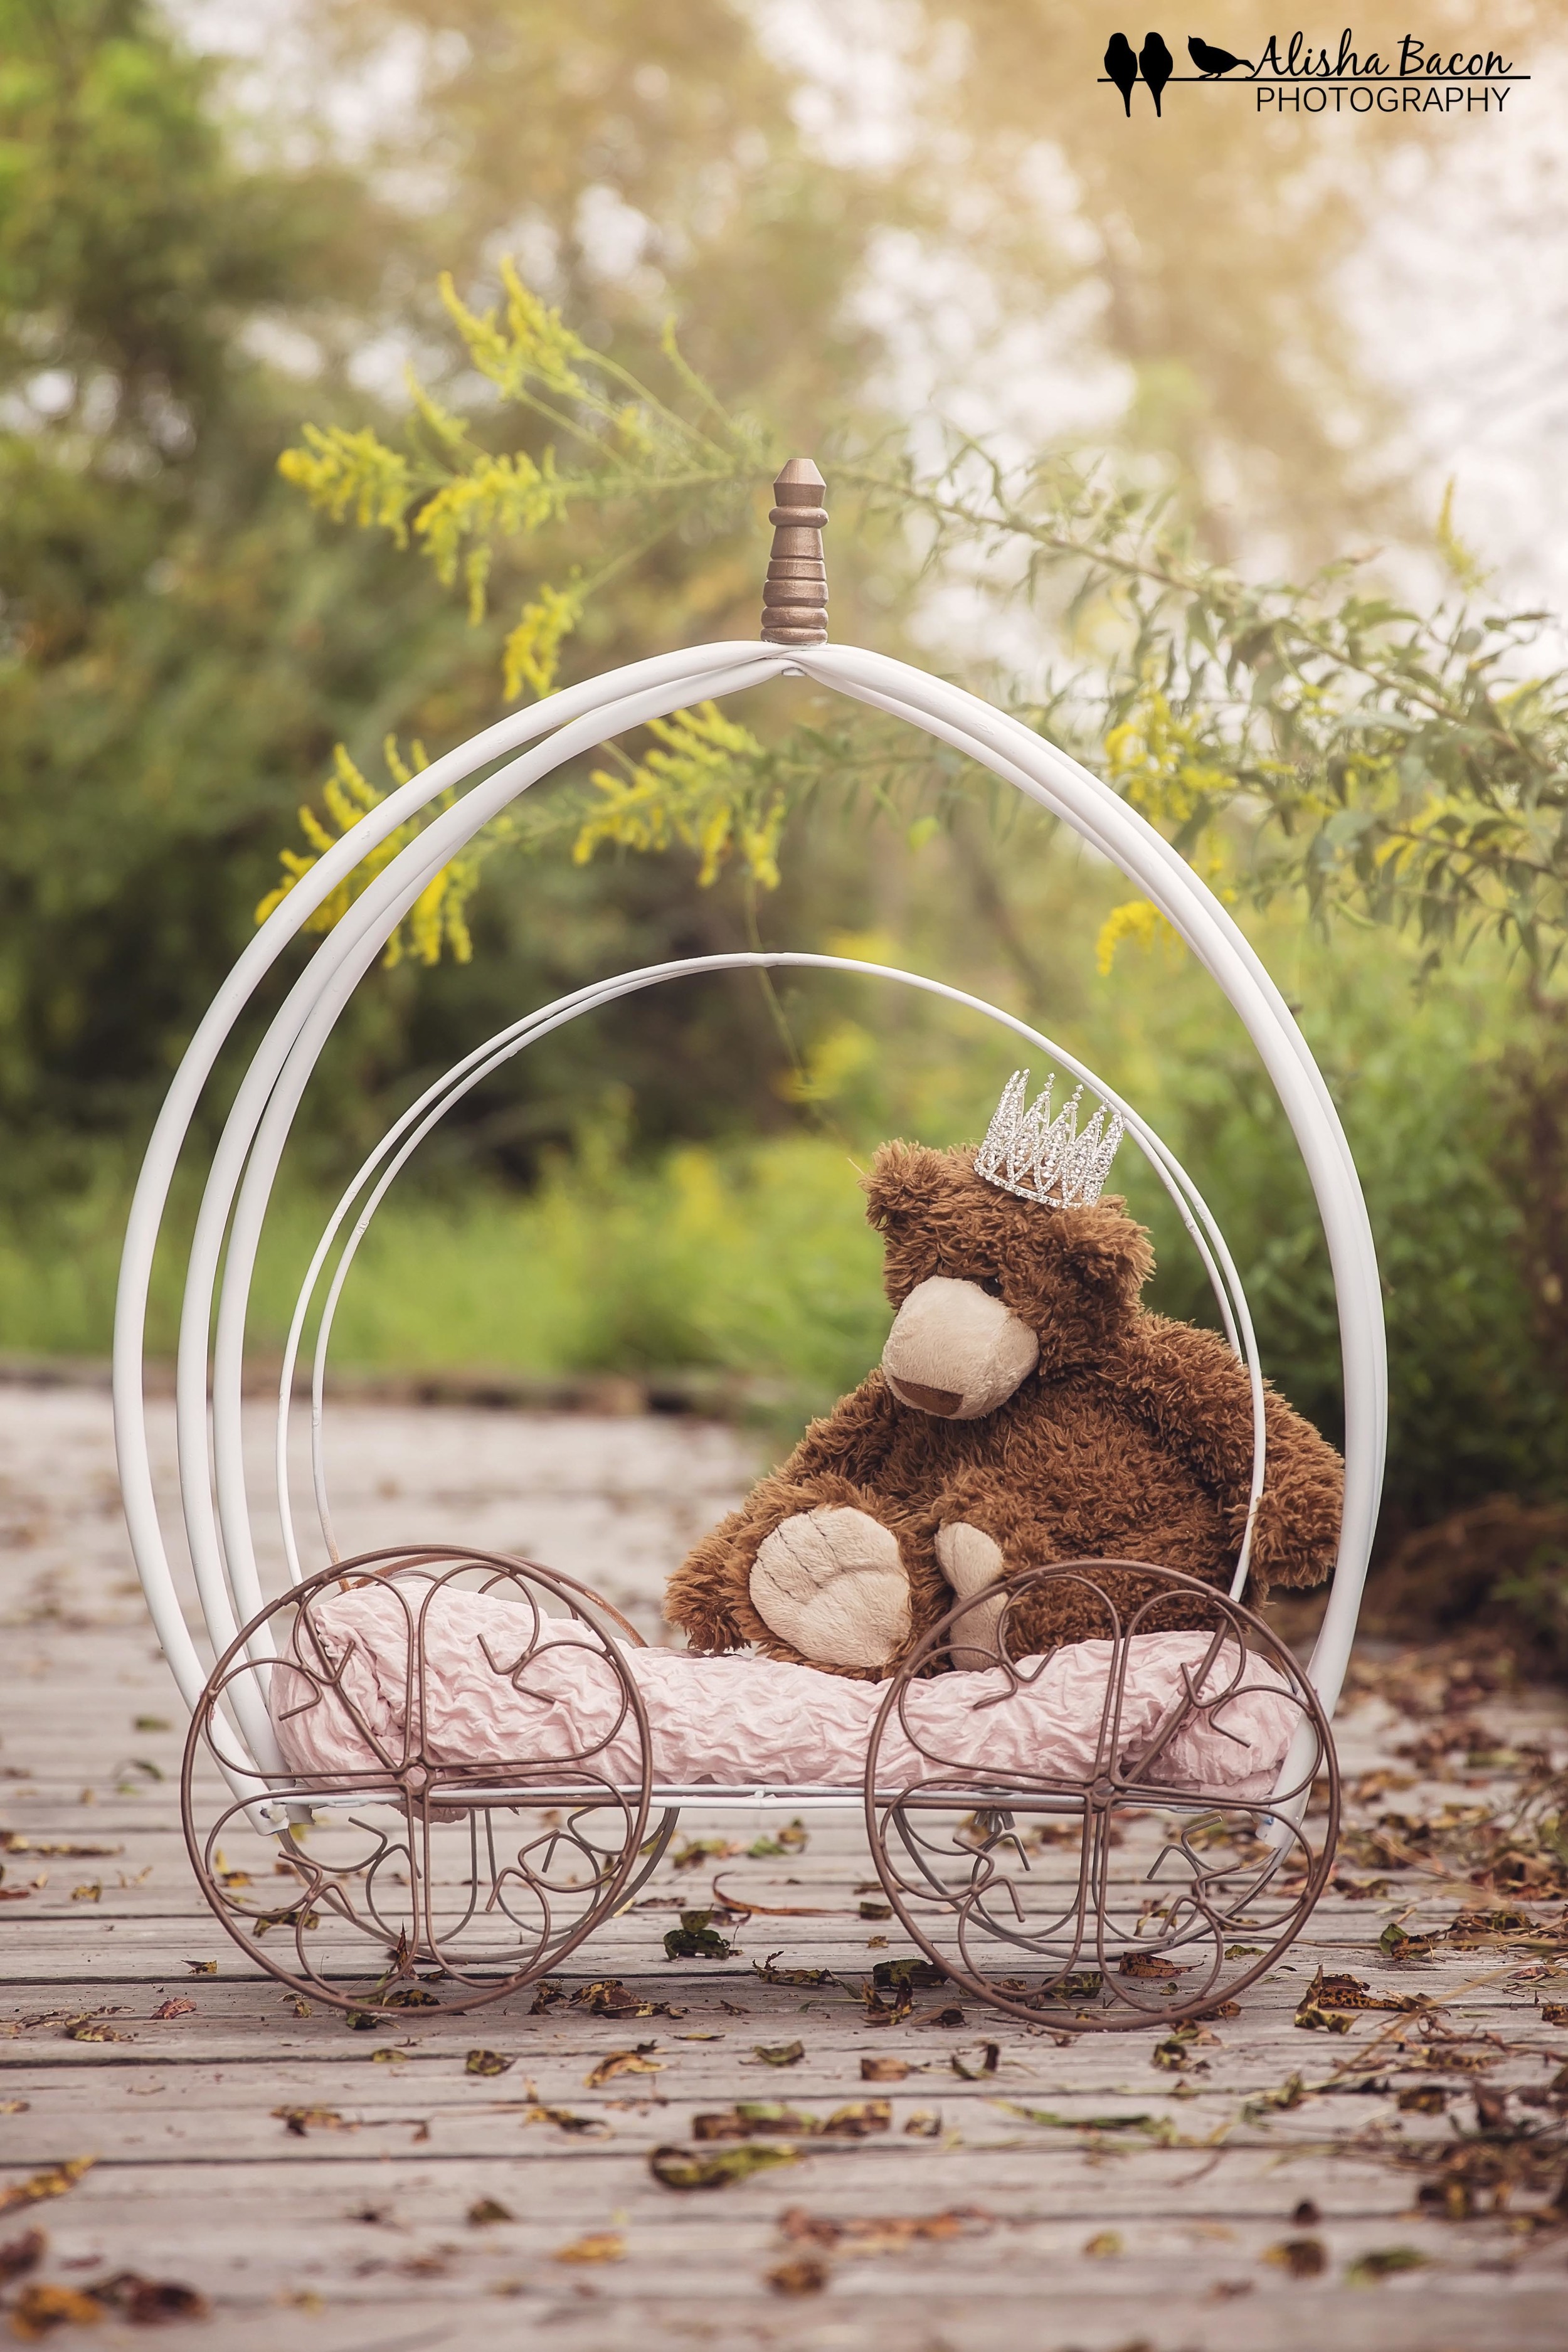
Newborn Princess Carriage Photography Prop DIY Tutorial | Knoxville Newborn Photographer
Newborn Prop Carriage Tutorial
I don't know about other newborn photographers, but my prop stash is ALWAYS expanding. I think it's actually a slight addiction! One of my lovely clients aptly called it a "Prop-lem". With that said, I've been eyeballing a lovely newborn carriage prop for quite some time, but the one readily available on the market wasn't quite what I was looking for.
After seeing a few pictures online of DIY carriages, me and my husband set out to create our own. Sadly, there were no online tutorials we could base ours on that I could find, so I documented our progress to write one for others. It was actually quite simple and in-expensive! It came in under $60, which makes it all the better!
We used a plant stand as our base and designed it around it. It was perfect, with gorgeous "wheels" to simplify our DIY process.
To start you'll need:
Plant Stand (I bought mine on Amazon *here* ) -$25
3 Child sized Hula Hoops ( 20-24inches. Found mine at the Dollar Tree) - $3
2 Cans white spray primer - $8
Can of white spray paint - $4
Can of gold spray paint- $4
Can of spray clear coat - $4 (Optional, but cuts down on scratches and whatnot)
Wooden topper ( banister topper from Lowes in the Lumber section) -$4
Nut to fasten wooden topper ( check to make sure it fits on the screw of the topper) $.50
Zip ties - $2
Painter's tape - $3
Tools:
Dremmel or saw that can cut through a bit of metal (optional)
Drill
Sharp scissors
Assuming you have all the tools (we did), the total cost is just $57.50. You can't beat that for a beautiful, custom newborn prop!

Zip ties and a few cans of paint aren't pictured. We were working by trial and error and ended up having to pick up more!
To start, open up your plant stand box and discard the small wire shelf and bag of screws ( or put aside for another project!). Set aside the large wire shelf (this will become the platform for your newborn) and get ready to work with the sides of your carriage.
This is where you'll need the dremmel ( we used a dremmel with cutting blade) or saw. Cut off the cross rails at the top of the circle, and the handles that stick off of the side. Be sure to leave the brackets near the bottom on! If you think you can live with these on your prop, then this step could be skipped. Personally, I wanted them gone so the prop had a cleaner look to it.

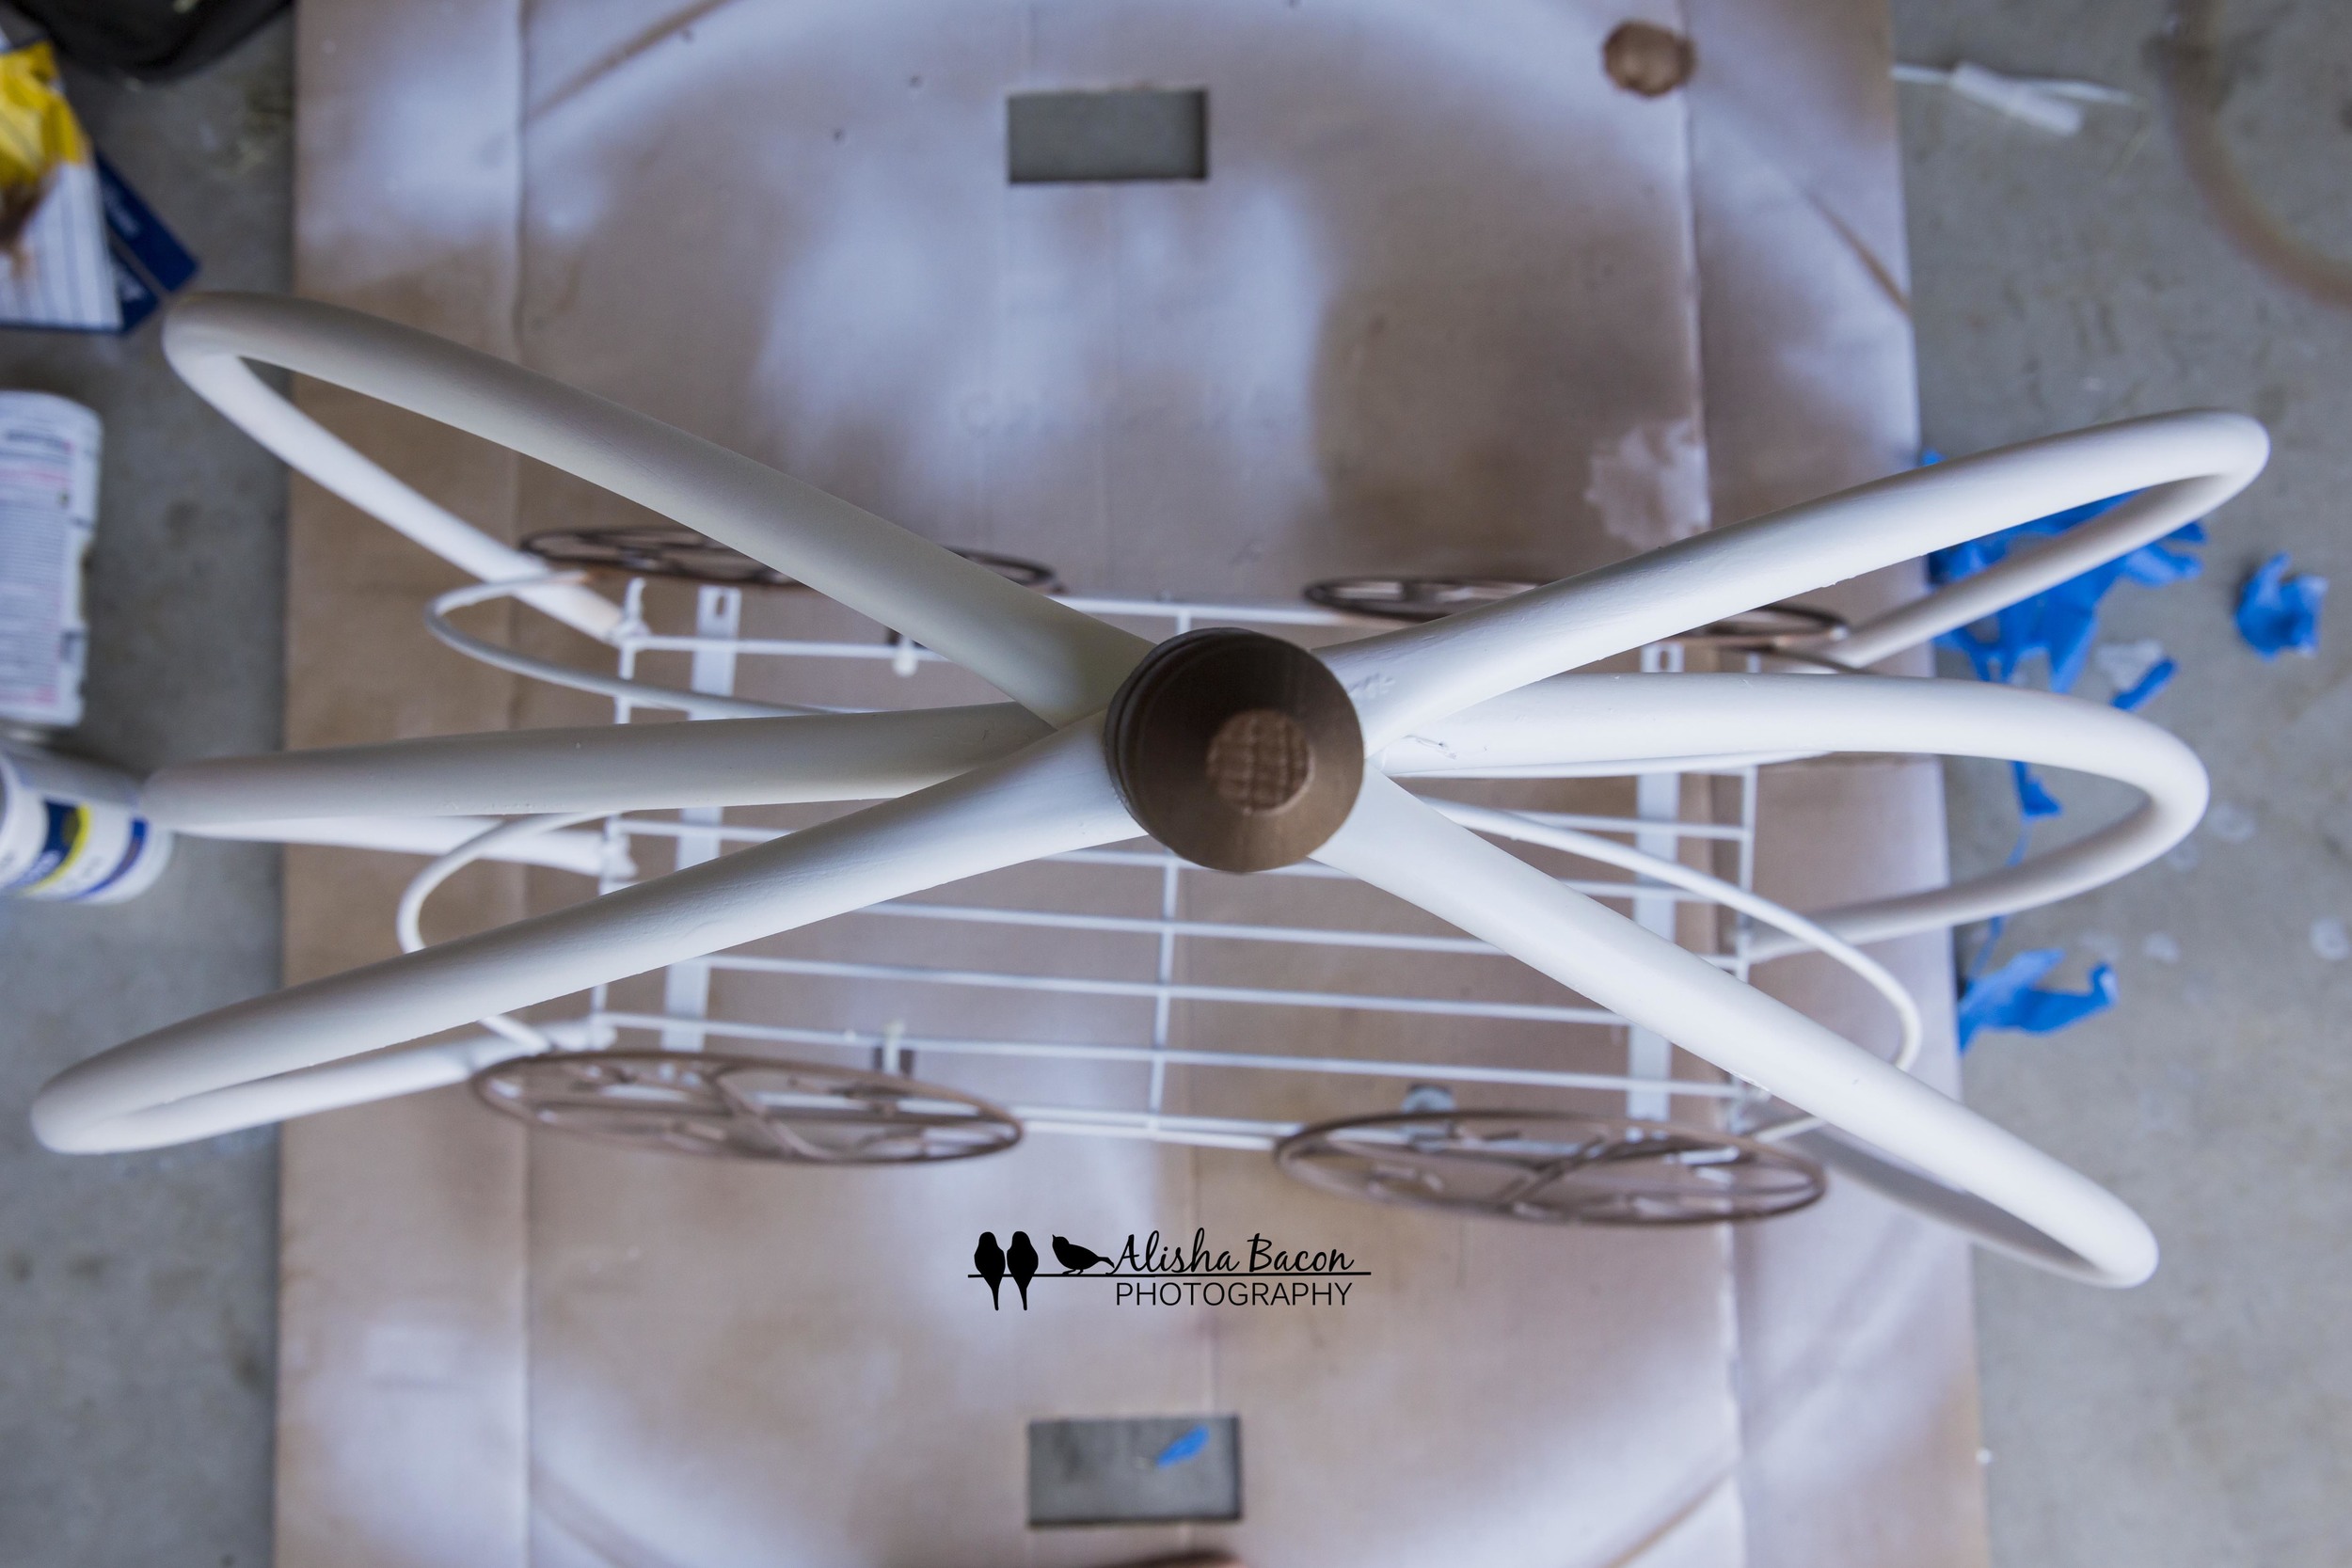
Next is the most time-consuming step; painting. Collect your plant stand sides, large wire shelf, wooden topper, and hula hoops and apply primer. I recommend two coats to cover the bright colors. Let stand until the pieces are dry to the touch. Add thick coat of white spray paint to sides, hula hoops, and the wire shelf. If needed, apply a second cot of white paint. Allow to fully dry before you move on, as not to smudge the pieces
Once your plant stand sides are dry, tape off the metal, except for the wheels using the painters tape, careful to cover anything you don't want to be gold in the final product. Apply gold paint to both sides of your carriage wheels. Also add a coat of gold paint to the wooden topper. Allow to dry about 20 minutes, and then add second coat of gold paint to wheels and topper.
Remove tape and allow to dry for 24 hours before moving on to the next step.

It's time to get the basic carriage together!! Gather your plant stand sides, wire shelf, zip ties, and scissors.
Sit stand sides upright, with wheel sides out. and place the large wire shelf on the brackets towards the bottom . Secure the shelf with four zip ties on the corners of the shelf. Be sure to to tighten them down as much as possible to make it secure. Once the shelf is firmly in place, pull the circular top portion of the shelf together, forming a pyramid out of the frame, and secure together with a zip tie. This gives the carriage base mush more stability than if you leave the plant stand sides straight up and down. Trim all of the zip tie ends using your scissors, leaving as little as possible.
Woo-hoo!!! Your basic carriage is now complete!!!

Oops! I forgot to trim my zip ties before this picture. This is what it should look like at this time.
Now it's time to bust out the hula-hoops. Using scissors, cut each hula hoop, so that it's no longer a full circle. Place one end on either side of your shelf to see how big your carriage will be when you attach the hoops to the base. Trim each hula hoop as needed (keeping them the same size). I trimmed around nine inches off of each one to make it a size I was happy with.
Once you've trimmed them to the appropriate size, you'll need to select a drill bit that will make a large enough hole for a zip tie to easily fit through. Drill a hole through each end of all three hula hoops. You'll need to make sure the drill goes through both sides of the hollow hoop.
Attach the hoops, using zip ties, the one end( short side) of your carriage. One hoop next to each wheel , and one in the middle. Attach the middle hoop straight across, to the middle of the opposite side and secure with a zip tie. Criss cross the remaining hula hoops so that you fasten them towards the opposite wheel on the other side of your carriage and fasten with zip ties.
Your topper isn't on yet, this is just for criss-cross reference.
Keep your drill handy, with a drill bit that will make a large enough hole for the screw of your wooden topper to fit through. Gather the hula hoops, find the middle, and drill a hole though all three hoops. Insert your topper's screw through all three hoops, and secure tightly with nut. Trim off zip tie ends from your hula hoops.
Your beautiful carriage is now together, and you're just about done! This is the perfect time to touch up any paint scrapes may have occurred during assembly.
The last step is optional, but I highly recommend it, as the plastic hula hoops are quite prone to scrapes. Apply a coat of clear top coat to the entire carriage.
Ta-Da!!! You're done, ad have an awesome prop to show for your hard work! You can embellish it how you'd like and use different fabrics as your cushion to change up the look.
I hope you enjoyed the tutorial, check back for more!